
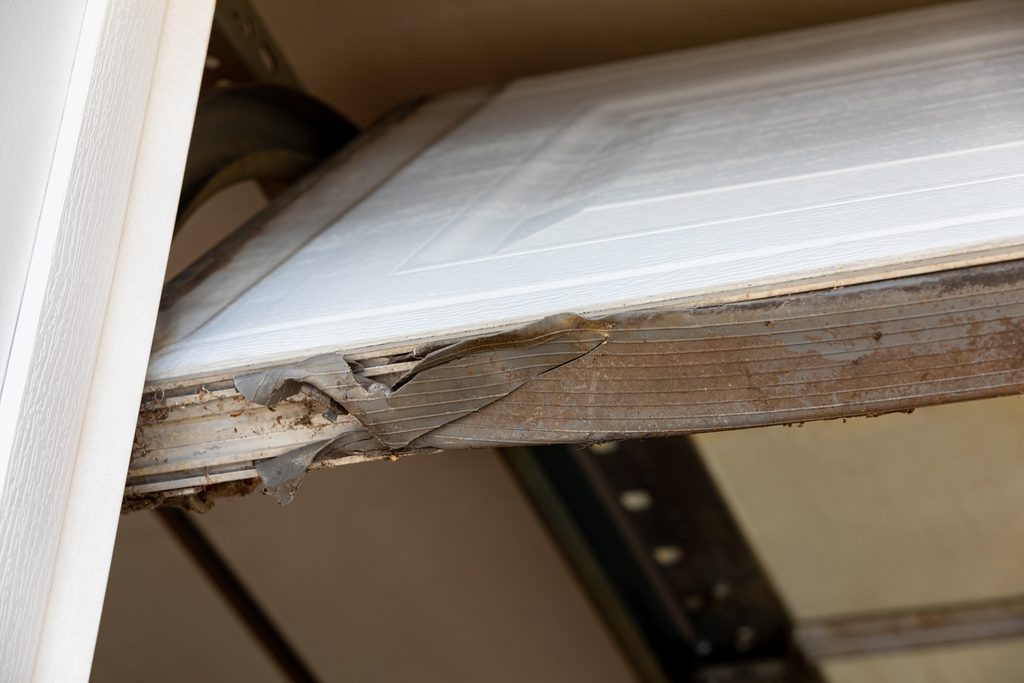
A garage door seal does more than finish the bottom edge of your door. It helps block drafts, water, dirt, leaves, snow, and pests from entering your garage. When the seal is cracked, flat, loose, or missing, your garage can feel colder in the winter, hotter in the summer, and less protected from the outdoors.
If you are researching how to replace a garage door seal, the good news is that some bottom seal replacements can be manageable for a handy homeowner. The key is choosing the right replacement seal, preparing the door correctly, and knowing when the issue is bigger than the seal itself.
This guide covers the basics of garage door seal replacement, including signs your seal is failing, common seal types, tools needed, step-by-step replacement tips, and when to call a professional.
How Do You Replace a Garage Door Seal?
To replace a garage door seal, you will usually need to:
- Identify the type of seal currently on your garage door.
- Measure the width of the door.
- Remove the old garage door seal.
- Clean the retainer track or bottom edge of the door.
- Cut the new seal to the correct size.
- Slide or fasten the new seal into place.
- Close the door and check for daylight, drafts, or gaps.
The harder part is making sure you buy the right seal and that the garage door closes evenly after the new seal is installed.
What Does a Garage Door Seal Do?
A garage door seal helps close the gap between the garage door and the floor, frame, or door sections. The bottom seal is the most common seal homeowners replace, but side and top weatherstripping can be just as important.
A properly fitted garage door seal can help:
- Block cold drafts
- Reduce water and snow entering the garage
- Keep out dirt, dust, and leaves
- Help deter mice, insects, and other pests
- Improve comfort inside the garage
- Support better weather protection
- Help the garage door close more evenly against the floor
If your garage is attached to your home, sealing the garage door can also help make the space feel less exposed to outdoor temperatures. It will not turn the garage into a finished living area, but it can make a noticeable difference.
Signs You Need Garage Door Seal Replacement
You may need garage door seal replacement if the bottom of your door no longer closes tightly against the floor. A failing seal is usually easy to spot once you know what to look for.
Common signs include:
- Daylight showing under the garage door
- Water coming into the garage
- Cold drafts near the bottom or sides of the door
- Dirt, leaves, or snow blowing inside
- Mice, insects, or pests entering through gaps
- Rubber seal is cracked, brittle, torn, or missing
- Seal looks flat and no longer compresses
- Garage feels colder or hotter than normal
- Door does not sit evenly on the floor
- Seal is pulling out of the retainer track
- Weatherstripping along the sides or top is loose or damaged
If your door is crooked, off track, or not closing squarely, replacing the seal alone may not fix the problem. In that case, you may need professional garage door repair services to correct the underlying issue.
Read More: Helpful Steps for Manually Opening a Garage Door
Types of Garage Door Seals
Before buying a replacement, it helps to understand the different types of garage door seals. Not every seal fits every door.
Bottom Garage Door Seal
The bottom seal is the strip that runs along the bottom edge of the garage door. It compresses against the floor when the door closes. This is the seal most people mean when they are researching how to replace a garage door seal.
Bottom seals help block drafts, rain, snow, leaves, and pests. They are often made from rubber or vinyl and may slide into a metal retainer on the bottom of the door.
Side and Top Weatherstripping
Side and top weatherstripping seals the perimeter of the garage door opening. These pieces are usually attached to the trim or frame and lightly press against the closed garage door.
If you see daylight around the sides or top of the door, the bottom seal may not be the only problem.
Threshold Seal
A threshold seal is installed on the garage floor instead of the door. It creates a raised barrier that helps the bottom seal close more tightly.
Threshold seals can be helpful if the concrete floor is uneven, the driveway slopes toward the garage, or water tends to run under the door.
Brush Seal
Brush seals are sometimes used for larger gaps, commercial doors, or areas where flexible sealing is needed. They use dense bristles to help close gaps while still allowing movement.
Panel Weatherstripping
Some garage doors also have weatherstripping between the door sections. This helps reduce drafts where the panels meet as the door bends and moves.
How to Choose the Right Garage Door Seal
Choosing the right seal is one of the most important parts of garage door seal replacement. Replacement seals are not universal, and buying the wrong one can make the project frustrating.
Before you purchase a new seal, check:
- The existing seal profile
- The garage door width
- The retainer style
- Whether the seal slides into a channel
- Whether the seal is nailed, screwed, or fastened directly to the door
- The size of the gap under the door
- Whether the garage floor is level
- Whether you need bottom, side, top, or threshold sealing
Common Garage Door Seal Profiles
Garage door bottom seals come in several styles, including:
- T-style seals
- U-shaped seals
- Bulb seals
- Bead-style seals
- Nail-on seals
- Adhesive-backed seals
If your current door has a metal retainer track, the new seal needs to match that track. For example, a T-style seal will not work properly if the retainer is designed for a bead-style seal.
If you are not sure what type of seal you need, take a photo of the bottom of the door and the old seal profile before shopping for a replacement.
Tools and Materials Needed
For a typical bottom seal replacement, you may need:
- Replacement garage door seal
- Tape measure
- Utility knife or scissors
- Screwdriver
- Pliers
- Stiff brush
- Cleaning rag
- Mild soap and water
- Silicone-based lubricant or dish soap
- Gloves
- Step ladder, if needed
- Exterior caulk, if replacing side or top weatherstripping
Before you start, make sure the garage door is stable and safe to work around. If the door is damaged, off balance, or not closing correctly, stop and call a professional.
Read More: Signs Your Garage Door Sensors Are Not Aligned
How to Replace a Garage Door Seal Step by Step
The exact process depends on the type of seal and door you have, but the steps below cover a common bottom seal replacement.
Step 1: Open the Garage Door to a Comfortable Working Height
Raise the garage door high enough so you can safely access the bottom seal. Make sure the door is stable before working. Do not work under a door that feels loose, crooked, or unsafe.
If the door will not stay open or feels too heavy, there may be a spring or balance issue. In that case, call a professional before replacing the seal.
Step 2: Remove the Old Garage Door Seal
If the seal slides into a retainer track, pull it out from one end. Older seals may be stiff, torn, or stuck in place. You may need pliers to grip the seal and pull it through the channel.
If the seal is nailed or screwed to the bottom of a wood door, carefully remove the fasteners before pulling the seal away.
For stuck seals, avoid yanking so hard that you bend the retainer. A damaged retainer can prevent the new seal from sitting correctly.
Step 3: Clean the Retainer or Bottom Edge
Once the old seal is removed, clean the track or bottom edge of the door. Dirt, rust, old rubber, and debris can make it difficult to install the new seal.
Use a stiff brush, rag, and mild soap and water if needed. Let the area dry before installing the new seal.
Step 4: Measure and Cut the New Seal
Measure the width of your garage door. Cut the new seal slightly longer than the door width so you have enough material to work with. You can trim the extra after installation.
Avoid cutting the seal too short. A short seal can leave gaps at the edges of the door.
Step 5: Lubricate the Seal Lightly If Needed
If the seal slides into a retainer, a small amount of silicone-based lubricant or dish soap can help it move through the channel more easily.
Do not use heavy grease. Grease can collect dirt and make future maintenance harder.
Step 6: Slide or Fasten the New Seal Into Place
If your seal uses a retainer track, feed the seal into the channel and slide it across the bottom of the door. This is often easier with two people: one person feeds the seal into the track while the other pulls it gently from the opposite end.
If your seal is a nail-on or screw-on style, position it evenly along the bottom of the door and fasten it according to the product instructions. Make sure the seal is centered and not twisted.
Step 7: Trim the Ends
Once the seal is installed, trim any extra material at the ends. Leave enough seal to close the gap at each side without bunching or interfering with door movement.
Step 8: Close the Door and Check for Gaps
Lower the garage door and check the bottom edge. The seal should compress evenly against the floor.
Look for:
- Daylight under the door
- Gaps at the corners
- Areas where the seal does not touch the floor
- Bunching or twisting
- Water entry points
- Uneven contact
If the seal does not sit correctly, the issue may be an uneven floor, wrong seal profile, damaged retainer, worn weatherstripping, or a garage door alignment problem.
What If the Old Seal Is Stuck?
Old garage door seals can be stubborn. Over time, rubber can harden, swell, crack, or become packed with dirt inside the retainer.
You may need to cut the old seal into sections and remove it piece by piece. If the retainer is bent, broken, or badly rusted, the new seal may not slide in or stay in place. That is a good time to call Mountain View Doors for professional repair.
Should You Add a Garage Door Threshold Seal?
A threshold seal can be helpful when a bottom seal does not solve the problem on its own. Unlike a bottom seal, a threshold seal attaches to the garage floor.
A threshold seal may help if:
- Water runs toward the garage
- The concrete floor is slightly uneven
- Wind pushes rain or snow under the door
- Small gaps remain after replacing the bottom seal
- The garage needs extra protection from dirt and pests
However, a threshold seal must be installed carefully. If it is placed incorrectly, it can interfere with door movement or trap water in the wrong spot. Before installing one, make sure it is the right solution for your garage.
Common Garage Door Seal Replacement Mistakes
Even a simple garage door seal replacement can go wrong if the wrong part is used or the door has a larger issue.
Common mistakes include:
- Buying the wrong seal profile
- Measuring only the old seal instead of the door
- Forgetting to inspect the retainer
- Cutting the new seal too short
- Using heavy grease in the track
- Ignoring gaps along the sides and top
- Installing a threshold seal where it blocks door movement
- Trying to seal a crooked or misaligned door
- Ignoring damaged trim, rot, or worn hardware
- Assuming the seal is the only reason water enters the garage
If water still enters after replacing the seal, check the driveway slope, floor condition, side weatherstripping, bottom retainer, and door alignment.
Need Help Replacing Your Garage Door Seal?
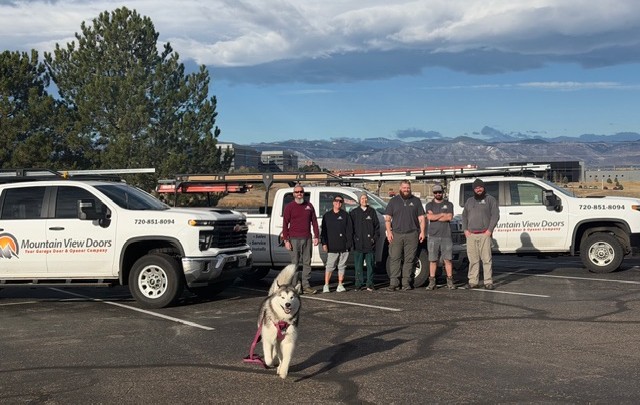
Now that you know how to replace a garage door seal, you can decide whether this is a project you want to handle yourself or one that needs professional help. If your garage has drafts, daylight, pests, water, or worn weatherstripping, Mountain View Doors can inspect the full door system and recommend the right solution.
For help with garage door seal replacement, weatherstripping, door alignment, damaged retainers, or larger garage door issues, contact Mountain View Doors today. We provide garage door services throughout Parker, Highlands Ranch, Denver, and the surrounding areas. Reach out to our professionals by phone at (720) 851-8094 to receive assistance.


